

I was set the challenge by Gumtree to buy an item to upcycle, which I took up without thinking!
I was excited and started looking around on their site straight away for something suitable in my area. I’ve never used Gumtree before so this was new for me. I wasn’t sure about the process but soon worked out that it’s really straight forward. I found an item I liked, messaged the seller asking whether it’s still available and when I’ll be able to pick it up. Once I set a date and time that’s good for both parties I set off with my other half to pick it up with cash in hand to give to the seller if the item was still as good as it is in the pictures. So, here it is – an old writing bureau that I’ve upstyled using the help of this furniture upcycling book. I hope you liked the finished look!
Step by Step Upcycling Tutorial with Pictures


What You Will Need:
- Milk Paint
- Wood Gloss Paint
- Black Graham & Brown Wallpaper
- Spray Adhesive
- Paint brushes, scissors, ruler – other stationary etc.
- Optional: Multipurpose filler and repair tools
Step One: Sand it Down
Once you’ve picked up your old fashion, battered Gumtree furniture it’s a good idea to sand it down, if it’s wooden that is, so that the existing, worn out lacquer is removed and therefore easier to repaint. I was lucky that the seller had already done this step for me and prepared the writing bureau for redecoration already as I find that it takes ages!
Step Two: Clean
Wipe it clean. I find this step one of the most useful of all as the seller has most likely kept the item in the garage or even outside so it gets rid of any dirt or dust or even cobwebs that might have accumulated. Use a damp cloth and be sure to let it dry fully before you begin – I used anti-bacterial kitchen wipes.
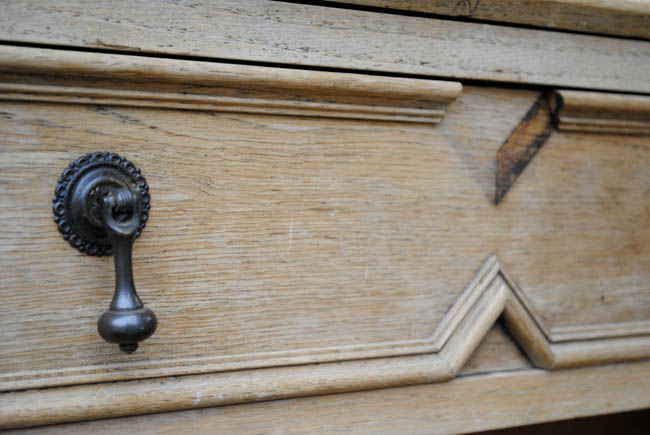
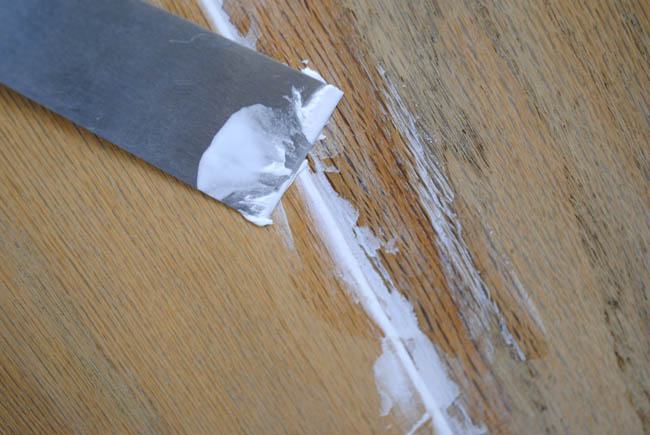
Step Three: Repair & Improvise
Repair the item. I used filler to cover up unsightly cracks or strange nail holes. I took off the old knobs too and made sure that the furniture is still functioning as it should (although you should probably do this before you buy also!) I even went as far as adding WD40 to the hinges.
Some parts of the drawers were missing, like the thin wooden design on the exterior so I removed them all completely on both drawers and made a clear space to add the black wallpaper onto. It actually made it easier to work with too so I’m glad I did.
Step Four: Design & Style
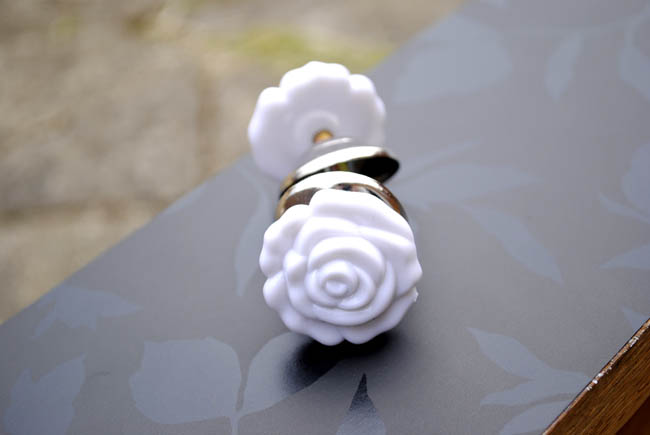
If you haven’t already, think about your design, as well as your next steps. So, what materials are you going to need and what do you want it to look like? I went for a monochrome look therefore I needed white paint, black wallpaper and I even bought white flower holders to replace the old knobs.
Step Five: Paint
Paint the item and let it dry. I used gloss paint for the inside of the bureau to add thickness to the wood as it looked like it was crumbling and getting thin. I then used milk paint (for the first time!) and found it’s super easy to use as it’s mainly water based, which means it’s mostly translucent (if you mix it to the ratio of 1:1) and it dries quickly too. It added a white finish to the wooden furniture but still showed off the beautiful wooden pattern, which I really liked.
Wait for the paint to dry before the next step.
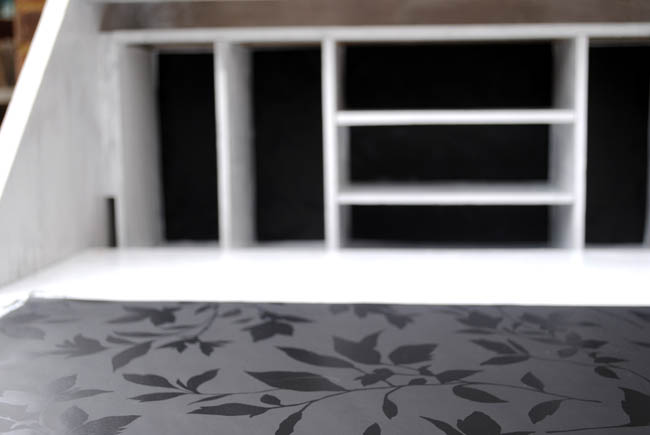
Step Six: Give it that feminine touch
It’s now all about the detailing and adding the finishing touches. I glued on black wallpaper to the drawers using a spray adhesive – simple. I added it to the writing area too and the back of the shelves inside the bureau. I then finished the item off with chic white drawer handles to complete that black and white contrast that I really wanted.
To Finish Up, Do Your Checks:
After a short time, simply do a quick check after everything has been put together. Check for any areas that you accidentally missed to paint, any wallpaper that hasn’t been stuck on properly. Finally, check that it’s still functioning how it should without your upstyling and decorations falling apart and when you’re satisfied you can feel awfully proud of your hard work 🙂
I’d love to see your projects so comment below or tweet me using @MrsAlinaGhost!
***


Melanie Kay Zelnick
Wow, this looks incredible!
Melanie @ meandmr.com
Annabel
I am defiantly rubbish with DIY, yet I still want to give this a whirl!
Annabel ♥
Mascara & Maltesers
cvetybaby
Wow such a great job! You have a talent! Nice!
xx
cvetybaby.com
Cheryl
Loved this tutorial so much – I need to upcycle! I have the upcycle itch! I’ve nominated you for the Liebster award (http://www.beaucience.co.uk/2015/06/liebster-award.html) as I think your blog is fab!
http://www.beaucience.co.uk
It's National Upcycling Day! Also a Guide on How to sell on Gumtree - The Fairytale Pretty PictureThe Fairytale Pretty Picture
[…] Upcycling Tutorial to Make a Monochrome Writing Bureau (with pictures!) […]
Emily
Wow this looks amazing! I absolutely love upcycling things, and you’ve done such a good job with this – I love it! x
emily x ⤠| emilyloula
Alina
Sigh of relief! It took me ages to upcycle so I’m glad you like it 🙂
Georgia Hope
This is so cool! Looks amazing 🙂 xx
Chasing Belle
Kirsty
This is a fantastic post, really in-depth and a great guide to up-cycling! Once I get my own place, I really want to give this a go!